Important:
Before trying to solve this problem, make sure to solve all other router problems detected by Avast. Otherwise the following fix will not be effective.
To configure NETGEAR wireless router:
- From the Wi-Fi Inspector results screen, select Go to your router settings to open the administration page of your NETGEAR router.
- Enter your router username and password, or contact the party who provided the router (e.g., your ISP).
- Go to
Advanced ▸ Advanced Setup ▸ Dynamic DNS ▸ ensure that theUse a Dynamic DNS Service option is unchecked.
- or -
Go toAdvanced ▸ Dynamic DNS ▸ ensure that theSelect provider option is unchecked, or set toNone . - Go to
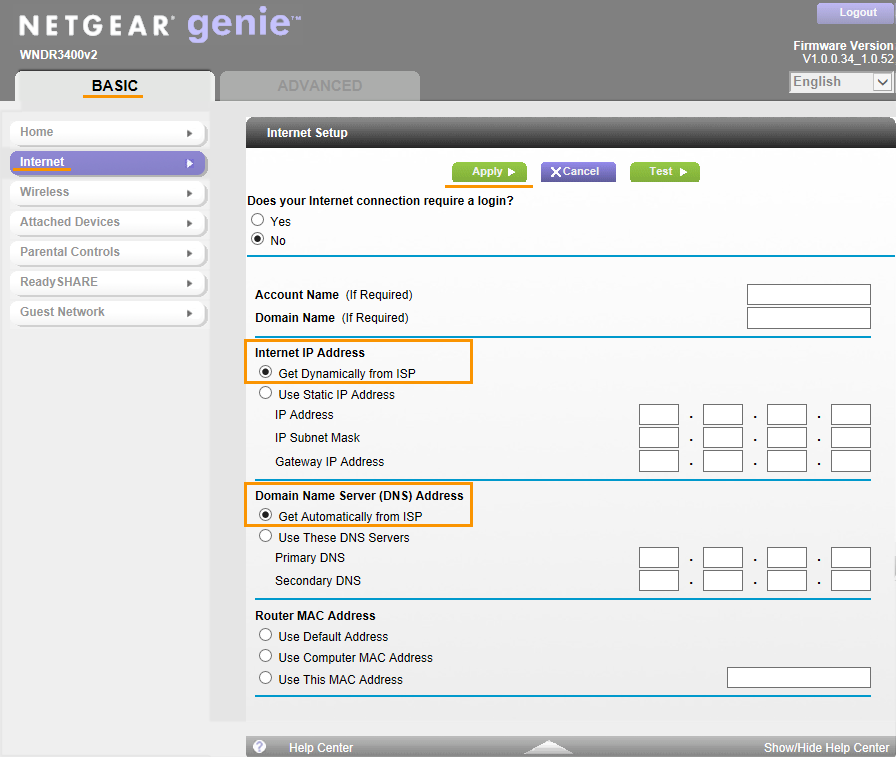
Basic ▸ Internet ▸ Domain Name Server (DNS) Address .
- or -
Go toAdvanced ▸ Setup ▸ Internet Setup ▸ Domain Name Server (DNS) Address .
- or -
Go toSetup ▸ Basic Settings ▸ Domain Name Server (DNS) Address . - If your ISP supports automatic configuration, change
Internet IP Address toGet Dynamically from ISP .
- otherwise -
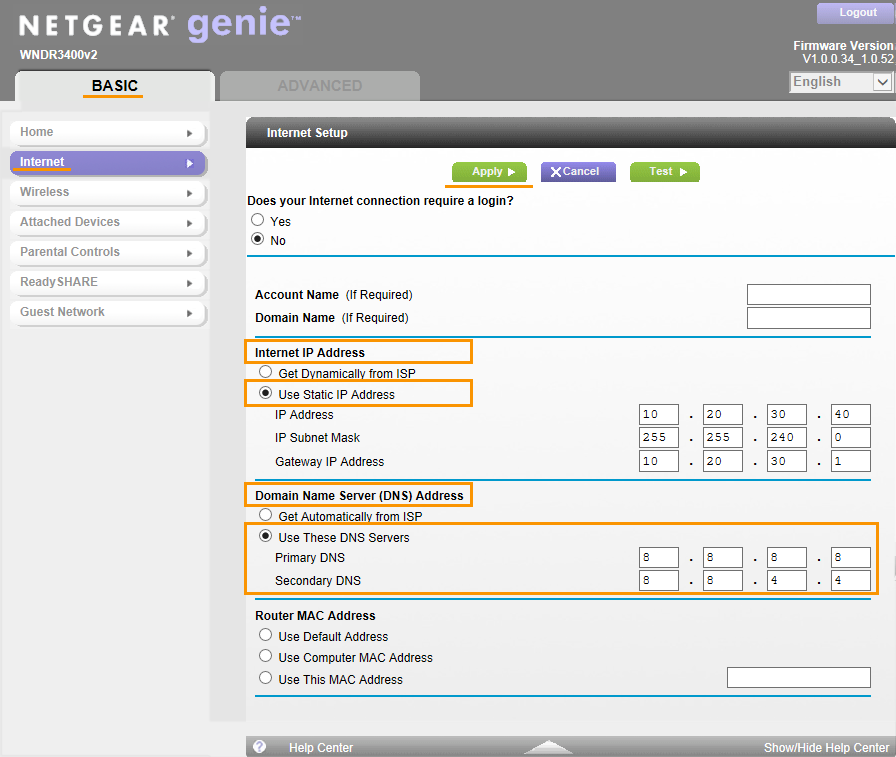
If your ISP doesn't support automatic configuration (e.g.Internet IP Address is set toUse Static IP Address ), fill inDNS server fields with IP addresses of reliable DNS servers, such as Google Public DNS, as shown below:
Primary DNS: 8.8.8.8 Secondary DNS: 8.8.4.4 - Confirm your changes by selecting
Apply and reboot your router if necessary.
Note:
Due to the wide range of different router types by NETGEAR, we offer general instructions for frequently used models. For exact instructions please consult documentation for your router model or contact NETGEAR for further assistance.


